
The last time I posted a waffle recipe here, several of you commented that you were on the fence about purchasing a waffle iron. Well, hopefully this recipe will push you firmly off the fence and into the magical land of waffle love.
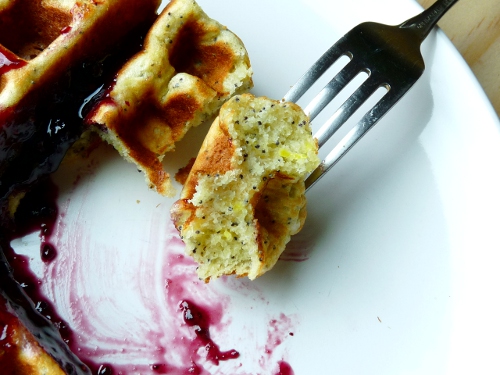
These are decidedly dessert-like waffles and yet I ate them for breakfast and strongly vote in favour of you doing the same. I used yoghurt instead of buttermilk and I found it gave them such a soft, rich texture so that it’s not unlike eating a lemon poppy seed muffin, in waffle form. The warmed blueberry sauce (my recipe is here) adds a wonderful decadent touch but if you’re looking for something more simple, spooning some blueberry jam on top would work too.
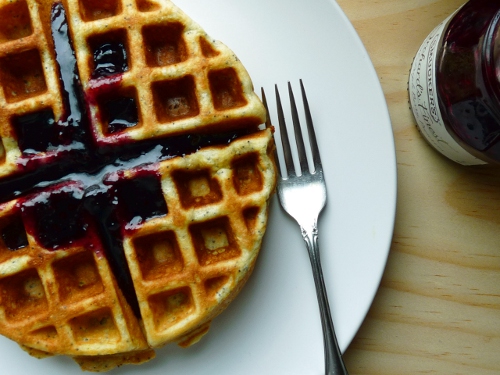
The lemon flavour is gentle and whilst the blueberry sauce is a bit of a dream, I actually really enjoyed the plain bites where I could feel the textural crunch of the poppy seeds and really taste the lemon zest. If you wanted to make them even more lemony, I’d recommend adding the juice of half a lemon to your wet ingredients. That would really make these zing. Happy waffling!
Lemon Poppy Seed Waffles
adapted from Bon Appetit, September 2000 via Epicurious
Ingredients
- 1 1/2 cups all purpose flour, sifted
- 6 tbsp sugar
- 2 tbsp poppy seeds
- 1 1/2 tsp baking powder
- 1 tsp baking soda
- 1/4 tsp salt
- 3 large eggs
- 1 1/4 cups plain whole yoghurt
- 1/4 cup (1/2 stick or 2 oz) unsalted butter, melted
- 1 tbsp grated lemon zest (from about 2 lemons)
- Warm blueberry sauce, to serve
Directions
- Combine the flour, sugar, poppy seeds, baking powder, baking soda, and salt in a large bowl and whisk together.
- In a medium sized bowl, whisk the eggs, yoghurt, melted butter, and lemon zest to blend. Add the yoghurt mixture to the flour mixture and whisk until just blended. Let the mixture stand and rest for 15 minutes. Great time to do the dishes!
- Preheat your waffle iron according to the manufacturer’s instructions. Spoon batter onto waffle iron. Cover and cook until golden and cooked through, about 7 minutes. Serve immediately with warm blueberry sauce.
My poor waffle maker has been languishing in my pantry for months, unused since the last batch of chocolate waffles. (Otherwise known as waffle dessert. For waffle breakfast, see here and here.) Dan has been talking longingly of the days when waffles made a regular appearance at breakfast so this weekend we did the decent thing and busted out the maker for some waffles.
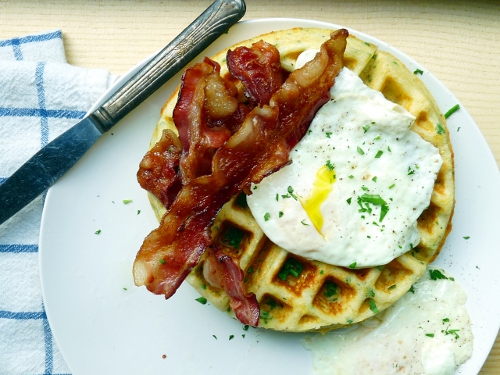
Not just any old waffles though. No. These waffles might just be the mightiest of them all. Forget sweet, we went savoury all the way with sharp cheddar, black pepper, chopped chives, parsley, and a decisive crunch of cornmeal. They are so good. You won’t need anything on top in my opinion so long as you have a couple of runny eggs and some bacon, but a dollop of sour cream wouldn’t go amiss.
The dough is pretty thick going into the waffle maker – fear not. The end result is fluffy and perfectly done.

Savoury Cheddar-Chive Waffles
adapted from Joy the Baker and Williams Sonoma
Ingredients
- 1 1/4 cup all-purpose flour
- 1/4 cup cornmeal
- 1 1/2 teaspoons baking powder
- 1/2 teaspoon baking soda
- 1/2 teaspoon salt
- 1/4 teaspoon coarse ground black pepper
- 1/3 cup melted unsalted butter
- 2 large eggs
- 1 1/4 cup buttermilk
- 1/2 cup finely grated cheddar cheese
- 3 tablespoons chopped chives
- 2 tablespoons chopped parsley
Directions
- Preheat a waffle maker on medium-high heat according to the manufacturer’s instructions.
- In a large bowl, whisk together flour, cornmeal, baking powder, baking soda, black pepper, and salt.
- In a medium bowl, whisk together the eggs, butter and buttermilk. Stir in the grated cheese. Add the wet ingredients to the dry ingredients, then add the chives and parsley. Stir until just incorporated. Try not to over-mix the batter.
- Cook according to your waffle machine instructions.
- Garnish with extra chives and parsley and serve immediately with bacon and fried eggs. Add a dollop of sour cream if you wish. Serves two.

Growing up my sister absolutely adored lemon curd. My mum would buy boxes of mini lemon curd tarts for her to take to school in her lunchbox every single day.
I wasn’t head over heels for straight up lemon curd as a child although I was always partial to a slice of lemon tart. However my grown up taste buds LOVE this stuff – as they love all things citrus – and really, what’s not to love?
If you’ve never experienced lemon curd (which I admit has a bit of a funny sounding name) you’re in for a real treat. And contrary to my expectations, it is incredibly easy to make.
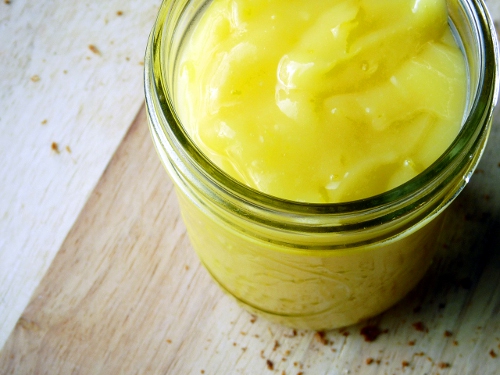
What you’ll end up with is a thick, tangy-sweet, incredibly yellow, very lemony preserve perfect for spreading on toast or a good hunk of bread, or for pouring into a pie crust for a killer lemon curd tart.
I looked at a bunch of different recipes – David Lebovitz’s seems to be popular – but I really liked Nigel Slater‘s. Since Meyer lemons tend to be much sweeter than conventional lemons I reduced the amount of sugar here but it’s still wonderfully sweet – so much so that I can’t seem to stop taking giant finger-swipes from the jar. Addictive to say the least.
Meyer Lemon Curd
from Nigel Slater via The Guardian
Ingredients
- zest and juice of 4 unwaxed Meyer lemons (if using regular lemons, increase the sugar to 200g)
- 160g sugar
- 100g butter, cut into cubes
- 3 eggs and 1 egg yolk, mixed gently with a fork
Directions
- Set a heatproof bowl over a pan of simmering water, being careful that the bottom of the bowl does not touch the water. Place the lemon zest and juice, sugar and butter into the heatproof bowl. Stir with a whisk from time to time until the butter has melted.
- Stir the eggs and egg yolk into the lemon mixture. Let the curd cook, stirring regularly, for about 10 minutes, until it is thick and custard-like. It should feel heavy on the whisk.
- Remove from the heat and stir occasionally as it cools. Pour into very clean jam jars (mason jars) and seal. It will keep for a couple of weeks in the refrigerator. Makes 2 small jam jars.


