Autumn

Waxwing Farm Harvest Party

October 1, 2012

We decided this year that we would sign up for a CSA with Waxwing Farm in Webster, MN. For the uninitiated, “CSA” stands for “Community Supported Agriculture” and is a way to buy local, seasonal food directly from a farmer, with no middle man involved. Farms offer a certain number of “shares” which usually consists of a box of vegetables, delivered weekly or bi-weekly. Many farms also offer dairy, meat, and flowers in their shares as well, if they’re available.

It’s an amazing way to learn about what’s really in season at what point in the year, and to eat incredibly fresh food. One of my favourite things has been getting exposed to new vegetables and therefore new ways of cooking because of an item popping up in our box that I’ve never used before. This happened with kohlrabi and tomatillos this season.

The other great thing about a CSA is that you develop a relationship with the farmer who grows your food and learn a TON about how it’s grown. Anna and Pete, who run Waxwing, kept us in the loop throughout the season with news on what was growing, what was struggling and everything in between.

We had to witness them and their crops suffer devastating floods in June which affected our boxes later in the summer. Understanding what weather patterns were contributing to the contents of our box, really helped me to appreciate the food we were eating.

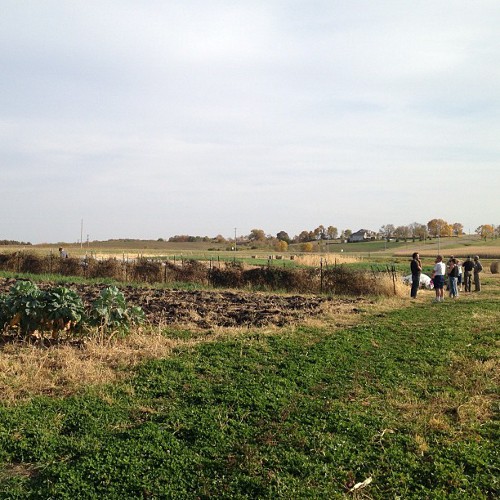
And finally, the ultimate bonus was getting to visit the farm this weekend for a harvest party and potluck. Meeting and chatting with Anna and Pete in person, walking through their fields, and being invited into their home really made the whole the experience of being part of a CSA share feel special.

There was a warm feeling of community between all the CSA share-owners and that was deepened by us sharing food we’d made for each other to enjoy.

If you’re interested, you can check out Waxwing Farm’s share options here. Needless to say, I highly recommend their CSA!

Have you done a CSA share before? I’d love to hear about your experiences!
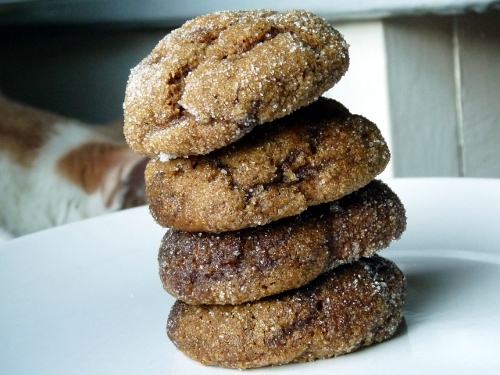
What do you do when you have leftover pumpkin? You make these cookies! They’re the loveliest combination of rich molasses-sweet and ginger-spicy. If you wanted to you could substitute wholewheat flour for a more earthy, textural experience – I love wholewheat flour with these sorts of flavours (see: wholewheat pumpkin waffles).

In other news I wanted to thank you all for your emails and messages about my last blog post. What was posted as a quick note received many words of wisdom. More to come soon but for now know that I made the Rustic Black Bean and Sweet Potato Soup I had linked to and it is seriously wonderful.  So, make soup and then…make these cookies.

Have a great weekend!

Pumpkin Ginger Molasses Cookies
adapted from Two Peas and Their Pod

Ingredients

  • ½ cup (1 stick) butter, at room temperature
  • 1 cup granulated sugar, plus more for rolling the cookies
  • ½ cup pumpkin puree
  • ¼ cup molasses
  • 1 large egg
  • 1 teaspoon vanilla extract
  • 2 ⅓ cups all-purpose flour
  • 2 teaspoons baking soda
  • 2 teaspoons cinnamon
  • 1 1/2 teaspoons ground ginger
  • 1 teaspoon ground cloves
  • 1/2 teaspoon salt

Directions

  1. Preheat oven to 350° F. Line a baking sheet with a Silpat or parchment paper.  In a large bowl, beat the butter and sugar together until it’s creamy and smooth. Add the pumpkin puree, molasses, egg, and vanilla extract, and mix until well combined.
  2. In a medium bowl, whisk together flour, baking soda, spices, and salt. Add your dry ingredients to wet ingredients gradually and fold until combined. Refrigerate the cookie dough for at least 1 hour.
  3. Place some extra white sugar in a small bowl. Roll tablespoon-sized balls of dough in sugar until well coated and place on baking sheet, about 2 inches apart. Bake for 10–14 minutes, or until cookies look cracked and set at the edges. The cookies will still be soft. Let them cool on the baking sheet for a few minutes, then transfer to a wire rack to cool completely. Makes about 3 dozen cookies.

pumpkin bread

October 17, 2011

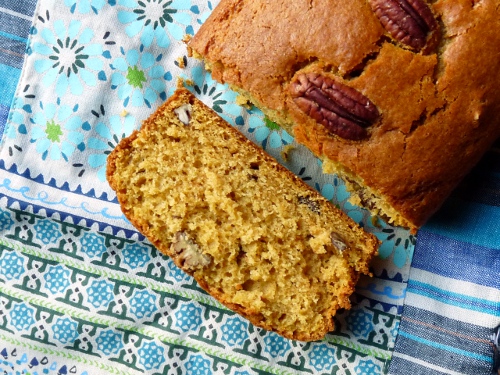
I love baking quick breads like this. For a novice baker it’s the kind of thing that gives me a rare hour of ultra-content. Baking quick breads is predictable, stable, and so satisfying. Whisk your dry, then your wet ingredients. Add one to the other, combine and bake.

What could be more simple and rewarding? Nothing better on a blustery Autumn day than a slice of warm pumpkin bread and a hot cup of tea (crazy cat dominating your lap is optional but unavoidable in my case…).

I got to share some of this loaf with new friends. That’s a nice sentence to write. New friends who I was fortunate enough to spend time with at a cabin this weekend. All local food bloggers so…we ate. Oh, heck yeah, we did. Unbelievable bacon jam that I was lucky enough to steal the leftovers of. Homemade breads, salsas, soups, salads, cakes, more jams. We did not go hungry, in case you were worried.

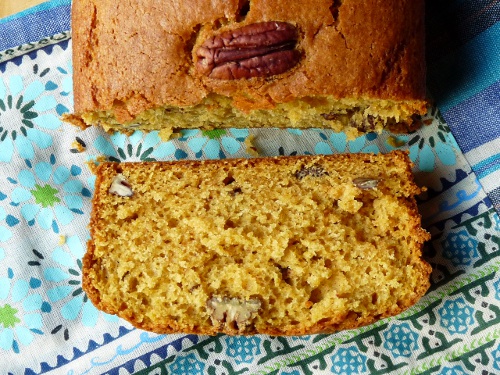
But back to my first pumpkin bread. It’s specked with little chunks of walnut and lightly spiced. It’s not overly pumpkin-y which I appreciate. Americans go so very wild for pumpkin, it’s slightly alarming. If you prefer a more subtle taste of pumpkin, try this.  It’s so very good, friends. Share it with yours, old or new.

Pumpkin Bread
adapted from A Cozy Kitchen

Ingredients

  • 1 1/2 cups all-purpose flour
  • 1 tsp baking powder
  • 1/2 tsp baking soda
  • 1/2 tsp salt
  • 1 cup pumpkin puree
  • 1/3 cup canola oil
  • 2 large eggs
  • 1 tsp pumpkin pie spice
  • 1 1/4 cups sugar
  • 1/2 cup chopped walnuts

Directions

  1. Preheat oven to 350F. Lightly grease a 9 x 5 inch loaf pan with softened butter and flour.
  2. In a medium bowl whisk together flour, baking powder, baking soda and salt.
  3. In a larger bowl, whisk pumpkin puree, oil, eggs, pumpkin pie spice, and sugar until smooth.
  4. Using a spatula, fold in the flour mixture until just combined, making sure to not over-mix the batter. Fold in walnuts.
  5. Add the batter to the greased/floured loaf pan and place in oven. Bake for 40-65 minutes (I find baking times vary wildly depending on your oven so more importantly, bake until a skewer inserted into the center comes out clean).
  6. Cool in pan on rack for 15 minutes, then invert and cool completely on a wire rack. Serve at room temperature.