We had the pleasure of a flying visit from family in Texas this past weekend and found ourselves on a mission for the farmers’ market. By lovely accident, we stumbled across Frogtown Farmers’ Market in St. Paul.

This small market has maybe 30 vendors, mostly Hmong, and is outstanding for its’ breathtaking amount of greens. We were almost overwhelmed by the sheer volume and choice but ended up grabbing a ton of Chinese spinach, green beans, and scallions (Spring onions) for $4. Amazing value.

This saute makes a gorgeously fresh summer breakfast for one if served with a poached or fried egg and some red pepper flakes on top. Alternatively you could use it as a side dish to fish or whatever you might be grilling. The green beans retain a lovely sweet crunch and their bright green colour while the spinach wilts lovingly around the garlic, onions, and oil.

Summer simplicity on a plate.

Simple Summer Greens Saute

Ingredients

  • large handful green beans, trimmed
  • 1 teaspoon olive oil
  • 2 tbsp onion, diced
  • 1 clove garlic, minced
  • 1 large handful Chinese spinach leaves, washed and dried
  • 1 tablespoon green onions, finely chopped
  • Coarse salt and freshly cracked black pepper

Directions

  1. Bring a pot of salted water to a boil over high heat.
  2. Add the green beans and blanch for 5 minutes, until fork-tender. Strain in a colander.
  3. Meanwhile, heat the oil in a skillet or saute pan over medium heat. Add the onion and cook until starting to turn translucent, about 5 minutes. Add the garlic and immediately add the just-cooked green beans. Cook for a few minutes, stirring constantly, then add the spinach and let it cook undisturbed for 1 to 2 minutes, just until wilted, then toss it with the green beans to combine.
  4. Season with salt and pepper to taste. Serve immediately and sprinkle with fresh green onions. Serves one for breakfast with an egg on top.

Note: It’s an approximate recipe, as you’ll see below, so feel free to use a little more, a little less. It goes without saying that you could use any summer greens here – I’d recommend a trip to your local market to see what you find.


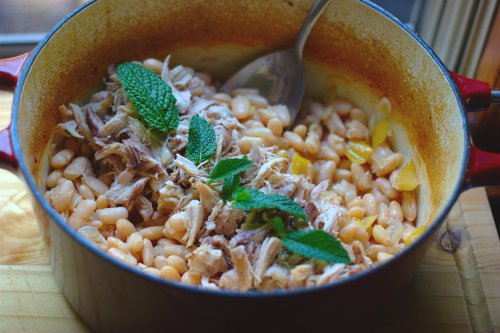
I fell in love with the idea of this meal over a week ago and set my heart on making it. Then a week of intense summer heat and humidity happened and there was simply no way in hell I was going to let my oven run at 350F for an hour and a flipping half.

Yet, still I craved the fall-apart braised chicken, the creamy beans, the lemony brightness, and another excuse to use that forest green mint pesto*.

Beans are soaked overnight, then drained and set aside while you cook up some onion and garlic in olive oil. The beans mix in along with some lemon peel and juice.

Chicken thighs are seasoned and loaded on top of the beans with fresh thyme. The whole pot is brought to a simmer (breathe it in) in water before you pop it in the oven to do its thing.

After an hour and a half of cooking, when the beans are creamy and tender beyond belief, you pull it out and add more lemon before removing the chicken.

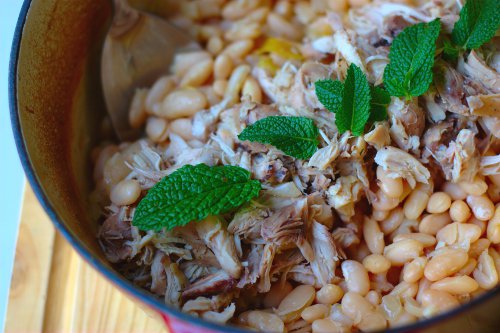
Once shredded, the chicken is returned to the pot and a lovely dollop of mint pesto is added.

*I had every intention of using the mint pesto I made last week but sadly when I retrieved it from the fridge, it had gone bad. Super sad. Luckily, this dish stands up perfectly well on its own, but if you can then surely make the pesto. I left it in the recipe knowing how much creaminess , texture, and flavour it could potentially add. This makes a healthy, hearty Summer supper full of wow. Yep, that’s a real thing.

Lemon Braised Chicken + Beans with Mint Pesto

adapted from The Kitchn

serves 6 to 8

  • 1 pound dried small white beans, such as flageolet
  • 2 tablespoons olive oil
  • 4 cloves garlic, minced
  • 1 small white onion, diced
  • 2 lemons
  • 2 pounds boneless skinless chicken thighs
  • Coarse salt and freshly ground black pepper
  • 4 sprigs fresh thyme
  • Several tablespoons of mint pesto, to serve
  1. Place the dried beans in a large bowl and cover them with water. Soak for 24 hours, or at least overnight — topping up the water as the beans soak it up. Drain the beans and set aside.
  2. Heat the oven to 350°F. In a 4-quart (or larger) Dutch oven or heavy ovenproof pot, heat the oil over medium heat. Add the garlic and onion and cook for 5 to 7 minutes, stirring frequently, until they are tender and the onion is nearly translucent. Add the drained beans and stir to coat the beans with the garlic, onion, and oil. Turn off the heat.
  3. Take a sharp vegetable peeler and carefully peel one of the lemons. Peel it in wide strips, taking care that you remove only the top yellow layer of peel — you do not want any of the bitter white pith. Add all of this shaved lemon peel to the beans and stir. Juice the lemon and add the juice to the beans. (Reserve the second lemon for later.)
  4. Pat the chicken dry, and lightly salt and pepper it. Lay it on top of the beans in the Dutch oven. Add water until it covers the beans and comes up to just below the chicken. Lay the thyme sprigs on top. Turn the heat to high and bring the water to a simmer. Cover the pot and put it in the oven.
  5. Bake for 1 1/2 hours, or until the beans are very tender and creamy.
  6. Remove the lid from the pot, and take out the chicken and put it to the side on a plate. Remove the thyme stalks. Zest and juice the second lemon, and stir the zest and juice into the beans. Shred or chop the chicken and place it back on top of the beans. Top with the mint pesto (recipe here) and serve.
  7. To serve, scoop up a spoon of beans, and top with chicken. Make sure each serving has a dollop of pesto as well. Serve with a green salad, and good bread to soak up the sauce.

9 comments     posted in:   Healthy Food, Recipe


peanut butter cup bars

July 22, 2011

When I originally moved to America, it wasn’t to my beloved Minneapolis, but actually to Austin, TX. I stepped off the plane onto American soil for the very first time, half expecting cacti and sand, and instead finding the hottest of heats and one of the most exciting cities I’d ever been to.

Austin was everything I wanted for my year of studying abroad. Wild, carefree, adventurous, full of sun, water, laughter, and new friends. That’s before we even get to the tacos and bbq.

One hot evening soon after arriving I visited a Walmart for the very first time (a CRAZY experience for a non-American, let me tell you) where under the supervision of a new friend I picked up a large bag of Reese’s pieces – the miniature version of those sugar bomb peanut butter “cups”. That bag lasted me through a first semester of crazy, adventurous, emotional roller-coasting, and fun.

And so you see, that these little beauties evoke special memories for me of arriving in a hot city with an unfamiliar feel.

Their presence in my little desk drawer (and the frequency with which they came out of said drawer and into my mouth) meant that they stud my memories of time spent in that room, writing essays, emailing home, sitting with new friends, enjoying that notable, intense sugar rush every time I popped one in my mouth.

They’re American as can be and extraordinarily rich so that a tiny little nugget is all you need to satisfy a craving. If you don’t have an intensely sweet tooth like I do then you might think about adding a graham cracker/digestive biscuit base to balance out the richness. To me, they’re perfect just as they are.

Peanut Butter Cup Bars
from Eat Live Run

Ingredients

  • 2 tablespoons brown sugar
  • 1 1/3 cup powdered sugar
  • 1/4 cup butter, softened
  • 3/4 cup creamy peanut butter
  • 7 ounces milk chocolate
  • 4 ounces semi-sweet chocolate
  • 1 tbsp butter

Directions

  1. Blend together the brown sugar, powdered sugar, butter and peanut butter until it reaches a smooth paste-like consistency. Press into the bottom of a nine by thirteen inch pan.
  2. Melt the chocolate with the tablespoon of butter over very low heat (or in a microwave). Pour melted chocolate over the peanut butter crust and stick in the fridge for an hour to harden.
  3. Cut into little squares or rectangles and serve. Makes about 48 small bars.

Note: If you’re making these in the summertime heat, keep ’em refrigerated for a delicious chocolate crunch.


10 comments     posted in:   Food Experience, Recipe