
Citrus season just isn’t letting up and I’m so very grateful. I was in D.C. for a couple of days last week – an absolute whirlwind visit – and had the fortune to eat at Central on Penn. Avenue, a James Beard award winning restaurant that delighted me with the best chicken burger I’ve ever had. Lemon chicken (somehow the citrus was worked into the perfectly cooked thigh meat) and a crisp, flat disc of fried cheese sitting atop. It was glorious.
A weird segue to cake, I realise, but it’s just another example of how citrus-obsessed I am. I fear it’s becoming a problem.
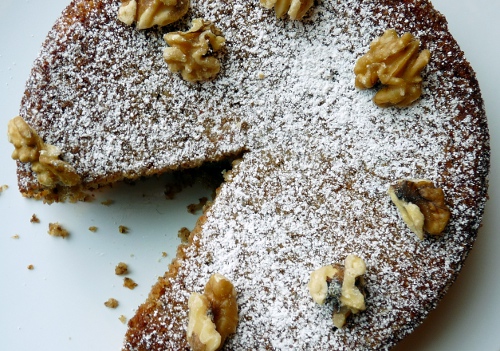
As soon as I saw this cake on one of my favourite blogs, Lottie + Doof, I knew I had to make it. As Tim says, it’s not a show-stopper of a cake; instead it’s what you might call an “everyday” cake.
Perhaps not dessert material but the perfect thing for a sweet breakfast with a strong cup of coffee or cosied up with a cup of tea and a book.
I’ll give you fair warning now – the mixture will feel wet and heavy with all that juice and olive oil in there. But the final product will be a bright, bold citrus flavour, a subtle nuttiness and an incredibly moist cake.
Orange-Walnut Cake
adapted from Bon Appetit Desserts via Lottie + Doof
Ingredients
- 1 1/2 cups chopped walnuts
- 1 cup all purpose flour
- 1 tablespoon baking powder
- 4 large eggs
- 1 1/3 cups sugar
- 1/2 cup freshly squeezed orange juice (I used Pomelo oranges)
- 1 1/2 tablespoons finely grated orange zest
- 1/2 cup olive oil
- confectioner’s sugar, to dust (optional)
Directions
- Preheat oven to 350°F. Grease a 9-inch-diameter spring-form pan with olive oil (I use a pastry brush). Place parchment paper round in bottom of pan and grease paper.
- Grind walnuts in a food processor until finely ground but not powdery. Combine the ground walnuts, flour, and baking powder in a medium bowl; set aside.
- Beat the eggs in large bowl until frothy, about 2 minutes. (Your arm is going to hate you, stay with it.) Gradually add the sugar, beating until light, thick, and pale yellow, about 4 minutes. (Again, arm hatred.) Gradually add the walnut-flour mixture; then add the orange juice, orange zest, and olive oil, beating just until blended. Transfer the batter to the prepared pan. Place pan on rimmed baking sheet and bake cake until tester inserted into center comes out clean, 50-60 minutes. Cool cake completely in pan on rack.
- Release pan sides. Carefully move cake onto platter. Sprinkle cake with confectioners sugar and serve.

The last time I posted a waffle recipe here, several of you commented that you were on the fence about purchasing a waffle iron. Well, hopefully this recipe will push you firmly off the fence and into the magical land of waffle love.
These are decidedly dessert-like waffles and yet I ate them for breakfast and strongly vote in favour of you doing the same. I used yoghurt instead of buttermilk and I found it gave them such a soft, rich texture so that it’s not unlike eating a lemon poppy seed muffin, in waffle form. The warmed blueberry sauce (my recipe is here) adds a wonderful decadent touch but if you’re looking for something more simple, spooning some blueberry jam on top would work too.
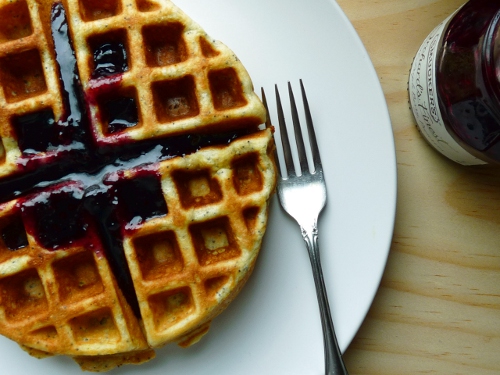
The lemon flavour is gentle and whilst the blueberry sauce is a bit of a dream, I actually really enjoyed the plain bites where I could feel the textural crunch of the poppy seeds and really taste the lemon zest. If you wanted to make them even more lemony, I’d recommend adding the juice of half a lemon to your wet ingredients. That would really make these zing. Happy waffling!
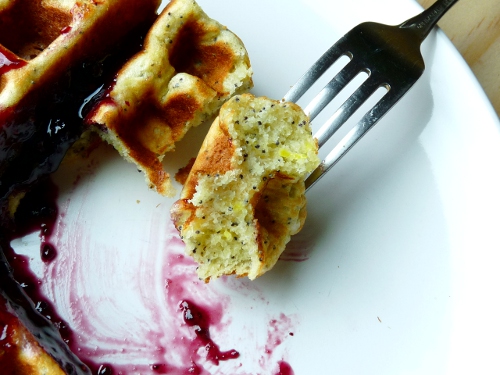
Lemon Poppy Seed Waffles
adapted from Bon Appetit, September 2000 via Epicurious
Ingredients
- 1 1/2 cups all purpose flour, sifted
- 6 tbsp sugar
- 2 tbsp poppy seeds
- 1 1/2 tsp baking powder
- 1 tsp baking soda
- 1/4 tsp salt
- 3 large eggs
- 1 1/4 cups plain whole yoghurt
- 1/4 cup (1/2 stick or 2 oz) unsalted butter, melted
- 1 tbsp grated lemon zest (from about 2 lemons)
- Warm blueberry sauce, to serve
Directions
- Combine the flour, sugar, poppy seeds, baking powder, baking soda, and salt in a large bowl and whisk together.
- In a medium sized bowl, whisk the eggs, yoghurt, melted butter, and lemon zest to blend. Add the yoghurt mixture to the flour mixture and whisk until just blended. Let the mixture stand and rest for 15 minutes. Great time to do the dishes!
- Preheat your waffle iron according to the manufacturer’s instructions. Spoon batter onto waffle iron. Cover and cook until golden and cooked through, about 7 minutes. Serve immediately with warm blueberry sauce.
On Saturday Dan and I ran a 5k race around Lake Harriet in Minneapolis. It was a breezy 1F (-20C) when we set off and most of the experience was spent trying to ignore the burning in my lungs and the numbing of my chin. Actually, it was really fun, as slightly extreme experiences like that tend to be, and we had a great time. But still – it was chuffing cold.
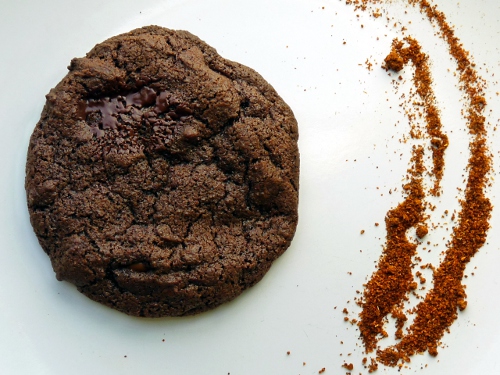
So I came home from the race and had a very long, very hot shower and a gorgeous fresh bagel and then set about making these cookies. Nothing soothes like a huge batch of chocolate-y, spiced cookies on a frigid day. Or any of the many days to follow…
The inspiration for these cookies came from David Lebovitz’s recipe for Mexican hot chocolate. I’ve started putting cinnamon in my hot chocolate and love it. Furthermore I’ve had a recipe for chipotle flour-less chocolate cake bookmarked for an ungodly amount of time. All of these ideas morphed in my mind until I decided that these cookies should come into existence.

I based the cookie recipe here on my chocolate cookies with sea salt (a perennial fave in the E4E household and one of the most popular posts on this blog) but added cinnamon and chile powder. I also omitted the sprinkling of sea and used half dark chocolate and half milk chocolate. I might use cayenne pepper next time in addition to or instead of chile powder. You can certainly taste the spice but it’s not overwhelming and the cinnamon is definitely the dominant flavour after chocolate, so adjust as you see fit.
Mexican Hot Chocolate Cookies
Ingredients
- 1 cup all-purpose flour
- 1/2 cup unsweetened cocoa powder
- 1/2 teaspoon baking soda
- 1/2 teaspoon salt
- 2 teaspoons ground cinnamon
- 1/2 teaspoon chile powder
- 4 oz dark chocolate (at least 70% cocoa), 2 ounces coarsely chopped and 2 ounces cut into 1/4-inch chunks
- 4 oz milk chocolate, 2 ounces coarsely chopped and 2 ounces cut into 1/4-inch chunks
- 1/2 cup (1 stick) unsalted butter
- 1 1/2 cups sugar
- 2 large eggs
- 1 teaspoon pure vanilla extract
Directions
- Preheat oven to 325F. Combine 2 ounces coarsely chopped dark chocolate with 2 ounces coarsely chopped milk chocolate with the butter and melt the two together in a pan. Remove from the heat and let cool slightly while you move onto step two.
- Sieve into a bowl and then whisk together the flour, cocoa powder, baking soda, salt, cinnamon, and chile powder; set aside.
- Put chocolate mixture, sugar, eggs, and vanilla in a bowl and mix until combined. Gradually add in the flour mixture. Fold in the remaining dark and milk chocolate chunks.
- Using a 1 1/2-inch ice cream scoop, drop dough onto parchment-lined (or Silpat-lined) baking sheets, spacing them 2 inches apart. Bake until cookies are flat and surfaces crack, about 15 minutes (cookies should be soft). Let them cool on parchment on wire racks. Cookies can be stored between layers of parchment in airtight containers at room temperature up to 3 days. Or, just invite some friends over and watch them disappear. Makes about 2 dozen large cookies.


