Gluten-Free

Rhubarb and Berry Jam

July 25, 2013

Rhubarb and Berry Jam

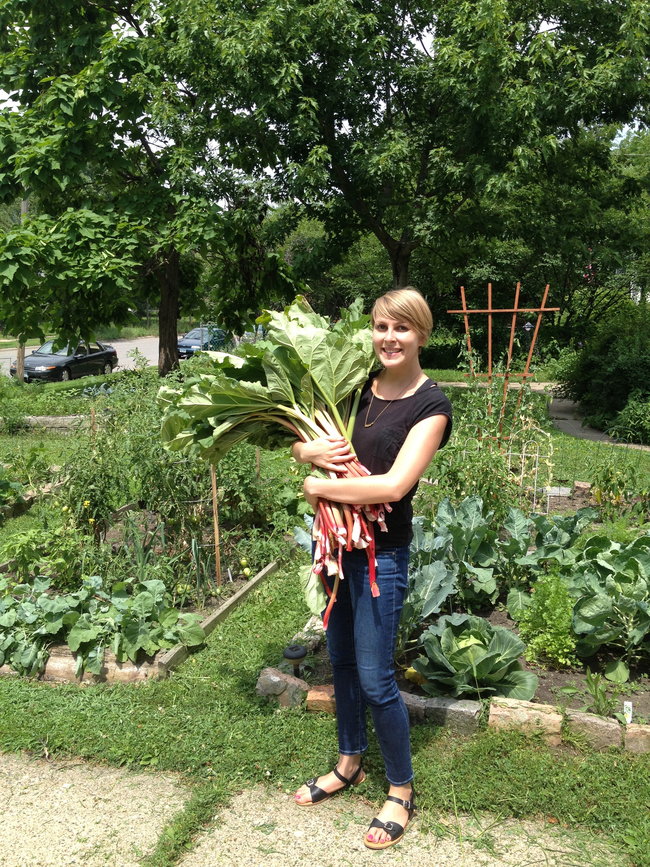
Hello! That’s me, looking all excited and a bit smug about the nine pounds of rhubarb I’m hugging to my chest. We had a bit of a jam-making extravaganza last weekend. That lush garden you can see behind me has nothing to do with me though. Sadly, I can claim no responsibility. It’s my friend’s garden and I know – it’s hard not to be envious of it if you don’t have one of your own.

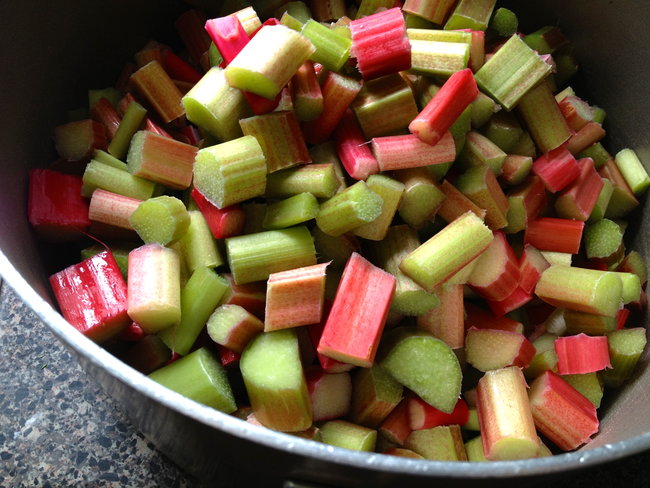
We had plans to deal with the mega amount of rhubarb still going strong over there so a few of us decided to make enough jam to feed a small army. We tripled the recipe you see below and used 9 pounds of rhubarb. So, I’m essentially carrying a chubby newborn’s worth of rhubarb in that photo. Aren’t I a natural?

Berry and Rhubarb Jam

Since we’re in the midst of berry season we added berries to balance out the rhubarb’s tartness. I’ve mentioned before that despite rhubarb and strawberry being the classic American pairing, I much prefer a rhubarb-raspberry combo. As David Lebovitz puts it, raspberries are a bit more assertive and I like that bold flavour so much more than the super-sweetness of strawberries. You could also use a mix of black and red currants, raspberries, blackberries, and strawberries, if you like.

Rhubarb Berry Jam

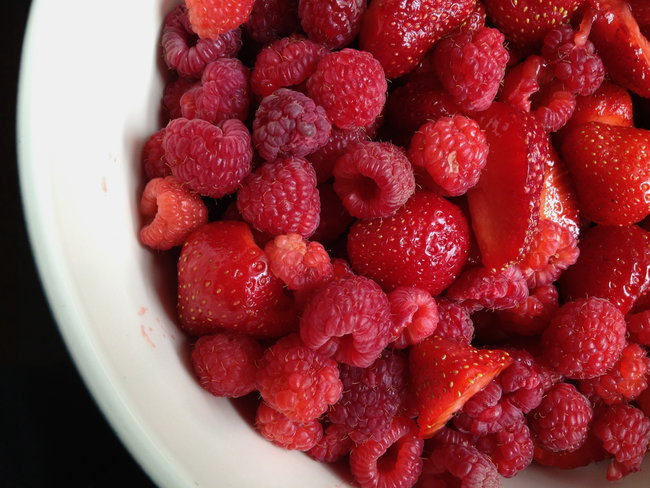
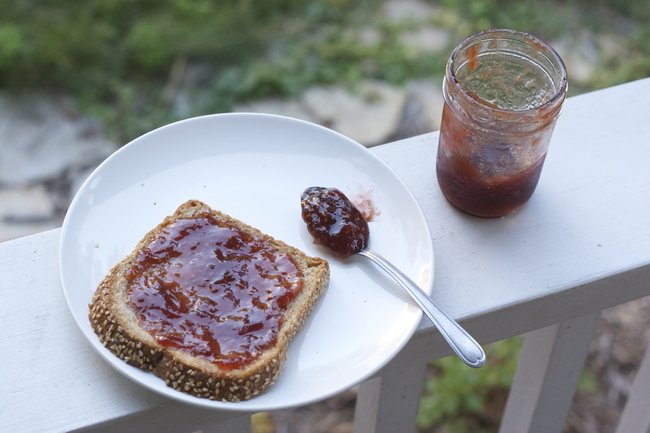
We ended up doing a mix of strawberries and raspberries with a heavy bias toward the raspberries and that was some good business. Dan proclaimed it delicious immediately and was raving about its flavour. It’s lovely on thick slices of toasted wholewheat bread and it makes a great “pb & j” alongside the deep nuttiness of almond butter. I’ve been eating more toast than is really reasonable for one person because of it. It’s tastes like sweet summer goodness at its simplest and finest.

Rhubarb Raspberry Jam

Rhubarb and Berry Jam
adapted from David Lebovitz

Ingredients

  • 3 pounds (1.25kg) rhubarb, trimmed and sliced into 1/2-inch (2cm) pieces
  • 2 cups (250g) packed fresh raspberries (or other berries of your choice)
  • 1 cup (250ml) water
  • 5 1/2 cups (1kg, plus 100g) sugar
  • juice of one lemon
  • pinch of salt

Directions

  1. In a large pot, mix the rhubarb, berries and the water. Cook, covered, stirring frequently over moderate heat, until the rhubarb is cooked through and thoroughly tender. It should take about 15 minutes. Put a small plate in the freezer.
  2. Add the sugar, lemon juice, and salt, and cook uncovered until the jam is thick and passes the wrinkle test.
  3. The wrinkle test: place a small spoonful of  jam on the frozen plate. Return it to the freezer and check it a few minutes later; if the jam wrinkles when nudged, it’s done. You can also use a candy thermometer; jam jells at approximately 220F (104C).
  4. Ladle the jam into clean jars, cover, and store in the refrigerator (it will last several weeks if kept in a tight-lidded container) or can them. We found simple instructions here. Makes 5 one cup (250ml) jars.

White Beans with Fresh Herbs

This simple combination of ingredients has become my saving grace. I make Pan-Fried White Beans and Greens at least once or twice a month. It’s an absolute weeknight staple in our house and we devour it. But as many times as I’ve made that dish, I always soak and cook too many beans and am left with a giant pile. I’ve found that cooked beans don’t last especially well and so I’ve wasted them more times than I’m really happy to admit.

White Beans with Fresh Herbs

Molly Katzen has single-handedly saved me and my beans from that fate with this little recipe. It’s so simple as to be a fantastic reminder that smaller – lighter – less – are often the best things to focus on when it comes to food. There are no bells and whistles to this salad – no other vegetables at all in fact – just a jumble of fresh herbs and some olive oil and acid. It makes a really great lunch salad and I imagine a buttered hunk of crusty bread would go well but it’s quite filling alone.

I typically throw in some lemon zest and chopped walnuts because (you guessed it) I have them left over from the Pan-Fried White Beans and Greens. You don’t have to include them but they certainly add a nice touch.

White Beans and Fresh Herbs

White Beans and Fresh Herbs
adapted from The New Moosewood Cookbook by Molly Katzen

Ingredients

  • 1.5 cups dry white beans
  • 3 tbsp olive oil
  • 2 tbsp red wine vinegar
  • 1 clove of garlic, minced
  • Small handful walnuts, toasted and chopped
  • Lemon zest from about 1/2  lemon
  • 1/2 tsp fresh basil, chopped
  • 1/4 cup fresh parsley, finely chopped
  • 3 tbsp fresh dill, finely chopped
  • Large pinch of salt
  • Lots of freshly ground black pepper

Directions

  1. Soak beans: place dried beans in a large pot and cover with about 3 inches of cold water. Set aside to soak for at least eight hours or overnight.
  2. Drain soaked beans and return to pot. Cover generously with water and bring to a boil and then reduce heat to a simmer and cook, partially covered, for about 1 – 1.5 hours, adding water as necessary and stirring occasionally, until tender.
  3. Once beans are done, drain and place them in a medium sized bowl.
  4. Add remaining ingredients to the beans and mix gently. Taste and adjust seasoning.
  5. Cover tightly and chill until cold.

Socca

I can’t quite express how addictive and wonderful I find socca to be. The first time I tried it I was home alone on a sunny Sunday afternoon and kept saying out loud to no-one at all, “oh my god, oh my GOD” as I took greedy bites. So if you’re wondering just how tasty and moreish socca is, now you know. It is talk-out-loud-to-yourself good.

In my opinion it’s best eaten straight from the cutting board that you use to slice it into squares. Just drizzle a generous amount of good olive oil, sea salt, and crushed black pepper on top and dig in with your fingers. That’s really all you need and I dare say, the first time you make it, that is exactly how you should experience it. Those flavours alone are plenty and allow you to taste the wonderfully nutty socca throughout. You’ll have bites that are crisp as crackers where the socca has blistered and begun to burn, and bites that are soft and pancake-y, and each bite is likely to make you fall in love anew.

Socca with Black Pepper

I first heard of socca from Stephanie Meyer on her blog Fresh Tart, which is full of imaginative, beautiful, gluten-free recipes. Socca is a thin unleavened pancake-type deal made very simply with chickpea flour, water, and olive oil.

It’s a specialty of Southeast France, particularly in and around the city of Nice, which was news to me because despite spending summers there in my teens I never came across socca. I think I need to go back and look harder. Apparently in that neck of the woods it’s formed into a flat cake and baked in an oven, often on a huge cast iron pan, and then seasoned generously with black pepper, wrapped in paper, and eaten while hot with your hands. It’s street food, intended to be washed down with a plastic cup of icy rosé. Put that on the must-do list.

Socca with Greens

I found some great advice both from Steph’s blogThe Kitchn, and the inimitable David Lebovitz on how to make socca and I’ve used that combined wisdom in my various attempts, all of which have happily been very successful. I like to eat socca plain as described above (and imagine myself standing on the stony beach in Nice, rosé in one hand; socca in the other), but there are lots of ways to enjoy it. Steph recommends it with a fried egg and spinach or as a grilled cheese-type construction. I also like it warm from the oven, piled high with some peppery greens dressed in lemon juice, olive oil, and honey. If you want to make more of a meal out of it, then this variation with pesto and a spring salad looks amazing and I’ve also heard wonderful things about adding a smear of olive tapenade.

Socca (Chickpea Flour Pancakes)

Makes 2 thin 10″ pancakes

Ingredients

  • 1 cup (92 g) chickpea flour (also known as gram flour)
  • 1 cup (240ml) water (add an additional tbsp water for a thinner pancake)
  • 1 1/2 tablespoons extra-virgin olive oil, plus more for the pan
  • Sea salt
  • Optional seasonings: 1 tablespoon chopped fresh herbs (rosemary, thyme, oregano), pinch of spice (chili powder, cumin, smoked paprika, za’atar)
  • Optional toppings: try fresh arugula dressed in lemon juice, olive oil, and honey – or – olive tapenade with some fresh greens – or – a fried egg and wilted spinach

Directions

  1. Sieve the chickpea flour into a bowl and whisk together with the water, olive oil, a pinch of salt and any other seasoning you’re trying. Cover with a tea towel and let the batter rest for 1/2 hour to 2 hours to give the flour time to absorb the water.
  2. Set an oven rack six inches below your oven’s broiler and turn on the broiler. Set a cast iron skillet on the rack to warm for five minutes.
  3. Add a teaspoon or so of olive oil to the pan and swirl to coat the bottom of the warmed pan. Whisk the chickpea batter quickly and then pour half into the hot skillet. Tilt the pan so the batter coats the entire surface of the pan.
  4. Broil the socca for 3 to 5 minutes or until you see the top begin to blister and brown. If you find the top browning before the batter is fully set, move the skillet to a lower oven rack until done. The socca should be fairly flexible in the middle but crispy on the edges.
  5. Carefully remove from the oven and use a spatula to work your way under the socca and ease it from the pan. Slice it into wedges or squares, sprinkle with salt and pepper, and drizzle with a little good olive oil. Repeat with any remaining batter.