Food and Culture

Homemade Chapati and Simple Dal

My goal with sharing recipes on this blog has always been to focus on simple dishes. I’m happiest making and eating fresh, simple, and (mostly) healthy meals and I like sharing how easy that can be to achieve. There are beautiful blogs out there which will guide you through making complex recipes and which challenge and push boundaries. I don’t think I’m pushing any boundaries here, except to offer a (currently) meat and dairy-free approach to cooking that focuses on whole food, plant-based recipes.

It’s easy to fall into the trap of thinking that cooking from scratch has to mean time spent frantically dashing around the kitchen trying to whip up something chef-fy and impressive. I think there’s a chance that rather than encouraging people to cook, the current glut of competitive cooking shows on TV only alienates us normal folk and makes cooking delicious food at home seem impossibly complicated and unachievable.

Dal with fried onions

We don’t spend a huge amount of money on food – we’re on a budget and I like the challenge of making delicious meals without spending a lot. We do buy mostly organic produce although the fact that I don’t eat meat or dairy has shrunk our food spending massively. Organic fruit and vegetables certainly come at a price, but it’s nothing compared to meat and dairy, organic or not.

I also don’t have a huge amount of time to spend cooking most days. If I’m lucky, after work there’s an hour available to make something before it’s so late that only toast is practical. At the weekends, more often than not we prefer to be out in the world, exploring this new city rather than hunkered down.

Homemade Chapati

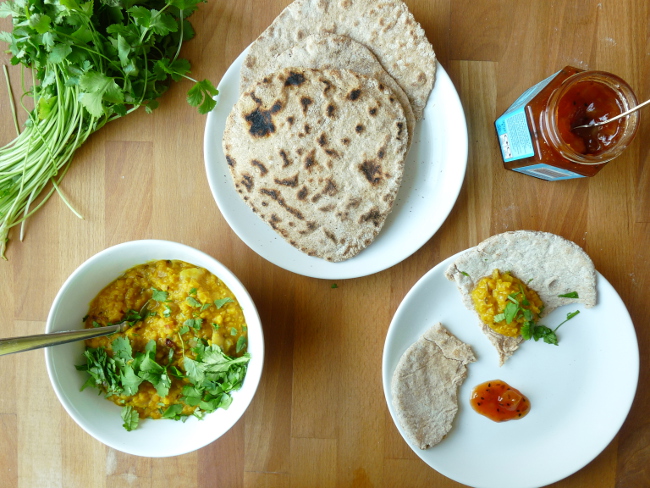
So, inexpensive, simple, quick, and nutritious are my priorities these days and this dal and homemade chapati fall squarely into those categories. Many people assume you need a full cabinet of spices to make good Indian food but this dish is here to prove that theory wrong.

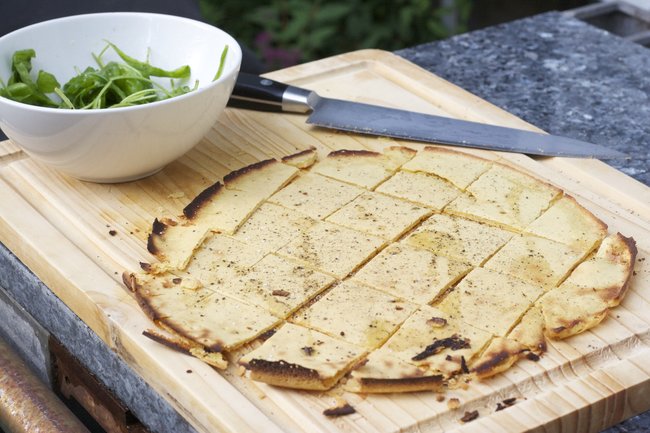
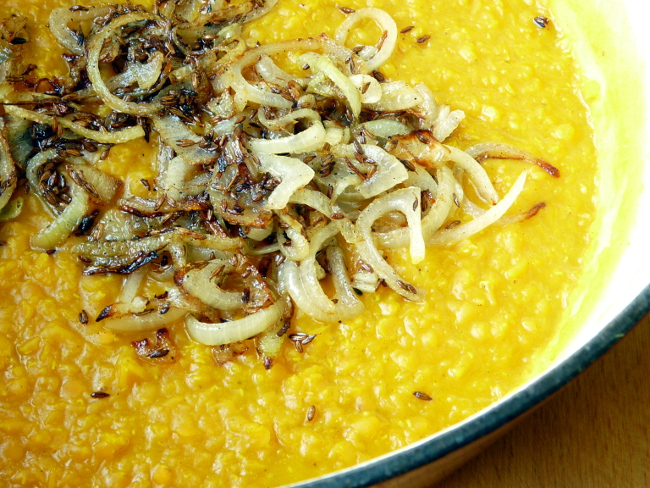
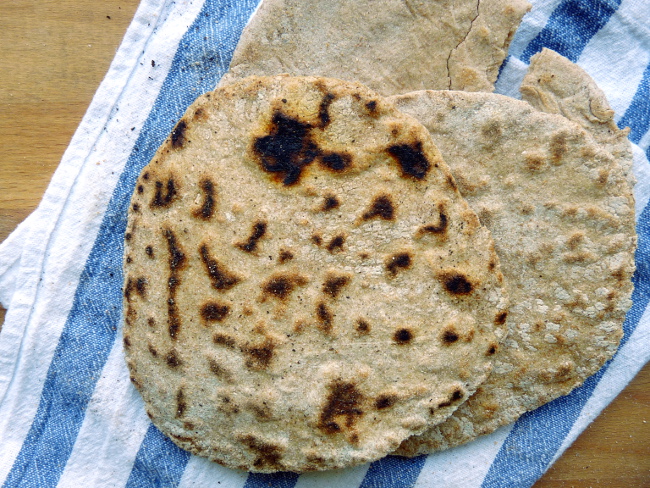
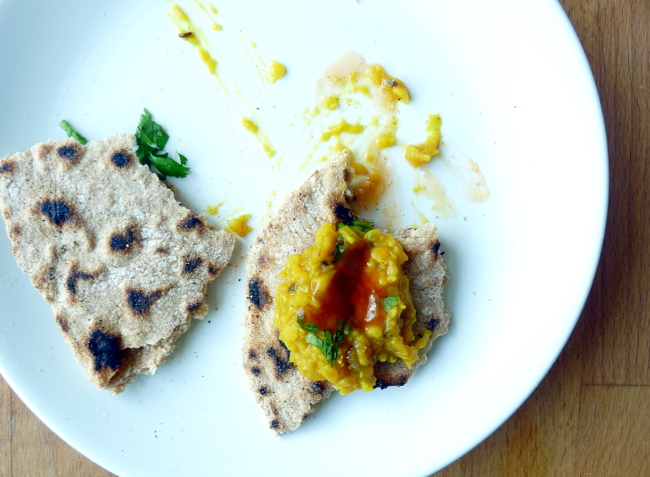
Dal is an excellent dish to make on a budget, requiring only red lentils, water, turmeric, an onion, and cumin seeds. You can’t really get more thrifty or simple than that and yet it packs an almighty flavour punch. Chapati also requires minimal ingredients to create soft, chewy, earthy-tasting, and perfectly charred breads that are lovely alone but perfect with a little chutney spread on them to scoop up dal. Since they require no rise, they are completely practical for a weeknight dinner too. Being lighter than their cousin, naan bread, I find that I can also eat more of them, which is one distinct bonus in my book.

Homemade Chapati and Simple Dal

Simple Dal
from River Cottage Veg

Ingredients

  • 250g / 1 ⅓ cups red lentils
  • 1 tsp ground turmeric
  • 3/4 tsp sea salt
  • 2 tbsp sunflower oil
  • 1 tsp cumin seeds
  • 1 onion, halved and thinly sliced
  • a small bunch of parsley or fresh coriander (cilantro), coarsely chopped

Directions

  1. Put the lentils in a saucepan with 800ml (3.5 cups) water and bring to a boil. Skim off any scum, then stir in the turmeric and salt. Lower the heat and simmer, uncovered for about 15 minutes, whisking vigorously occasionally. The lentils should break down and have the consistency of thick puréed soup. Keep warm in the pan.
  2. When the dal is just about done, heat the oil in a frying pan over medium heat. Add the cumin seeds and fry for a couple of minutes, until browned and fragrant. Add the onion and fry quite briskly for 5-10 minutes until golden brown, with some crispy edges.
  3. Tip the onion mixture into the hot lentils in the pan, cover and leave for 5 minutes, then stir them into the dal. Taste and adjust the seasoning as necessary. Serve with fresh parsley or cilantro on top and homemade chapati on the side.

Homemade Chapati (Indian Flatbread)
adapted from Saveur

Notes
If you can find chapati flour, by all means, use that. It’s a finely milled whole durum wheat flour called atta in Hindi. I used an organic wholemeal flour which turned out really well.

Ingredients

  • 240g / 2 cups organic plain wholemeal flour
  • 1 tbsp kosher salt
  • 1 tbsp organic canola oil
  • 250ml / 1 cup water

Directions

  1. Whisk together the flour, salt, oil, and water in a bowl until dough forms. Transfer to a work surface and knead until smooth, for about 4 minutes. Cover with a tea towel and let the dough sit for about an hour.
  2. Divide dough into 10 equal pieces and shape each piece into a ball. Using a rolling pin, roll each ball into a 12cm / 5″ round. Try to maintain a circular shape, but it doesn’t have to be perfect.
  3. Heat a dry cast-iron skillet or frying pan over high heat. Add a dough round and cook for about a minute before turning once, until cooked through and charred in spots, about 2 minutes.
  4. Transfer to a plate and repeat with remaining rounds. Serve hot. Makes 10 flatbreads.

Socca

I can’t quite express how addictive and wonderful I find socca to be. The first time I tried it I was home alone on a sunny Sunday afternoon and kept saying out loud to no-one at all, “oh my god, oh my GOD” as I took greedy bites. So if you’re wondering just how tasty and moreish socca is, now you know. It is talk-out-loud-to-yourself good.

In my opinion it’s best eaten straight from the cutting board that you use to slice it into squares. Just drizzle a generous amount of good olive oil, sea salt, and crushed black pepper on top and dig in with your fingers. That’s really all you need and I dare say, the first time you make it, that is exactly how you should experience it. Those flavours alone are plenty and allow you to taste the wonderfully nutty socca throughout. You’ll have bites that are crisp as crackers where the socca has blistered and begun to burn, and bites that are soft and pancake-y, and each bite is likely to make you fall in love anew.

Socca with Black Pepper

I first heard of socca from Stephanie Meyer on her blog Fresh Tart, which is full of imaginative, beautiful, gluten-free recipes. Socca is a thin unleavened pancake-type deal made very simply with chickpea flour, water, and olive oil.

It’s a specialty of Southeast France, particularly in and around the city of Nice, which was news to me because despite spending summers there in my teens I never came across socca. I think I need to go back and look harder. Apparently in that neck of the woods it’s formed into a flat cake and baked in an oven, often on a huge cast iron pan, and then seasoned generously with black pepper, wrapped in paper, and eaten while hot with your hands. It’s street food, intended to be washed down with a plastic cup of icy rosé. Put that on the must-do list.

Socca with Greens

I found some great advice both from Steph’s blogThe Kitchn, and the inimitable David Lebovitz on how to make socca and I’ve used that combined wisdom in my various attempts, all of which have happily been very successful. I like to eat socca plain as described above (and imagine myself standing on the stony beach in Nice, rosé in one hand; socca in the other), but there are lots of ways to enjoy it. Steph recommends it with a fried egg and spinach or as a grilled cheese-type construction. I also like it warm from the oven, piled high with some peppery greens dressed in lemon juice, olive oil, and honey. If you want to make more of a meal out of it, then this variation with pesto and a spring salad looks amazing and I’ve also heard wonderful things about adding a smear of olive tapenade.

Socca (Chickpea Flour Pancakes)

Makes 2 thin 10″ pancakes

Ingredients

  • 1 cup (92 g) chickpea flour (also known as gram flour)
  • 1 cup (240ml) water (add an additional tbsp water for a thinner pancake)
  • 1 1/2 tablespoons extra-virgin olive oil, plus more for the pan
  • Sea salt
  • Optional seasonings: 1 tablespoon chopped fresh herbs (rosemary, thyme, oregano), pinch of spice (chili powder, cumin, smoked paprika, za’atar)
  • Optional toppings: try fresh arugula dressed in lemon juice, olive oil, and honey – or – olive tapenade with some fresh greens – or – a fried egg and wilted spinach

Directions

  1. Sieve the chickpea flour into a bowl and whisk together with the water, olive oil, a pinch of salt and any other seasoning you’re trying. Cover with a tea towel and let the batter rest for 1/2 hour to 2 hours to give the flour time to absorb the water.
  2. Set an oven rack six inches below your oven’s broiler and turn on the broiler. Set a cast iron skillet on the rack to warm for five minutes.
  3. Add a teaspoon or so of olive oil to the pan and swirl to coat the bottom of the warmed pan. Whisk the chickpea batter quickly and then pour half into the hot skillet. Tilt the pan so the batter coats the entire surface of the pan.
  4. Broil the socca for 3 to 5 minutes or until you see the top begin to blister and brown. If you find the top browning before the batter is fully set, move the skillet to a lower oven rack until done. The socca should be fairly flexible in the middle but crispy on the edges.
  5. Carefully remove from the oven and use a spatula to work your way under the socca and ease it from the pan. Slice it into wedges or squares, sprinkle with salt and pepper, and drizzle with a little good olive oil. Repeat with any remaining batter.

Happy Thanksgiving!

November 19, 2012

rsz_1thanksgivingturkey

We’re hosting Thanksgiving this year for the first time. It was decided just a few days ago and I’m so excited! (Here’s why Thanksgiving is one of my favourite holidays, even as a Brit.) I thought I’d share what we’re thinking of serving. Please share in the comments what you’re making – or looking forward to eating – so we can all be inspired and share ideas!

Turkey
Cranberry sauce with orange zest and fresh nutmeg
Classic stuffing (though this cornbread sausage stuffing looks delicious)
Gravy
Perfect roast potatoes
Mashed maple sweet potatoes
Roasted carrots
Green beans with almonds and thyme
Warm bread rolls

IMG_0287

Pumpkin pie
Fruit cobbler
Chocolate pecan pie

P.S. My First Thanksgiving and other thanksgiving side dish ideas.

Top image by Katie Quinn Davies / What Katie Ate
Bottom image by Erin Jang / The Indigo Bunting